If your adhesive spray gun is acting up, you’re not alone and most problems are fixable in minutes. This adhesive spray gun troubleshooting guide walks you through every major issue: spray gun nozzle clogging fixes, uneven adhesive spray pattern causes, industrial spray gun leaking repairs, and adhesive gun air pressure problems. Whether you’re a professional applicator or a DIY enthusiast, this guide has you covered.
Most adhesive spray gun problems clogging, leaking, and uneven patterns come down to a dirty air cap, misaligned needle/nozzle, or incorrect air pressure. Start by cleaning the tip with solvent, check that all fittings are tight, and verify your PSI matches your adhesive’s viscosity. Read on for step-by-step fixes for each issue.
Before diving into fixes, it helps to understand why problems happen in the first place.
Spray guns are engineered to tight specifications and contain a large number of small parts that must work together in unison. Even though there can be upwards of 40 parts in a single gun, only a handful are high-use parts that experience wear and tear with every trigger cycle.
Consequently, about 90% of the issues that occur including clogging, leaking, intermittent spray, and uneven spray are caused by general wear and tear of these parts.
Understanding this means you can focus your troubleshooting on the most likely culprits first. Therefore, before replacing expensive components, always start with a thorough cleaning and inspection.
Clogging is the most common complaint among adhesive gun users. Fortunately, it’s also the most straightforward to fix.
Spray guns mix pressurized air with a liquid to create a mist. Liquid and air are sent to the gun separately and mixed at the tip to atomize the liquid. When liquids solidify, they can block the liquid or air passages, stopping the gun from spraying effectively.
Most clogs occur at the tip of the spray gun because the passage is at its narrowest in this area.
Additionally, this can be caused by the air pressure being too weak, which can stop the liquid from atomizing, or by a liquid type that quickly hardens once in contact with air.
On the flip side, the second form of clogging is due to spray pressure being too high. A high spray pressure can cause liquid to bounce back and adhere to the air cap.
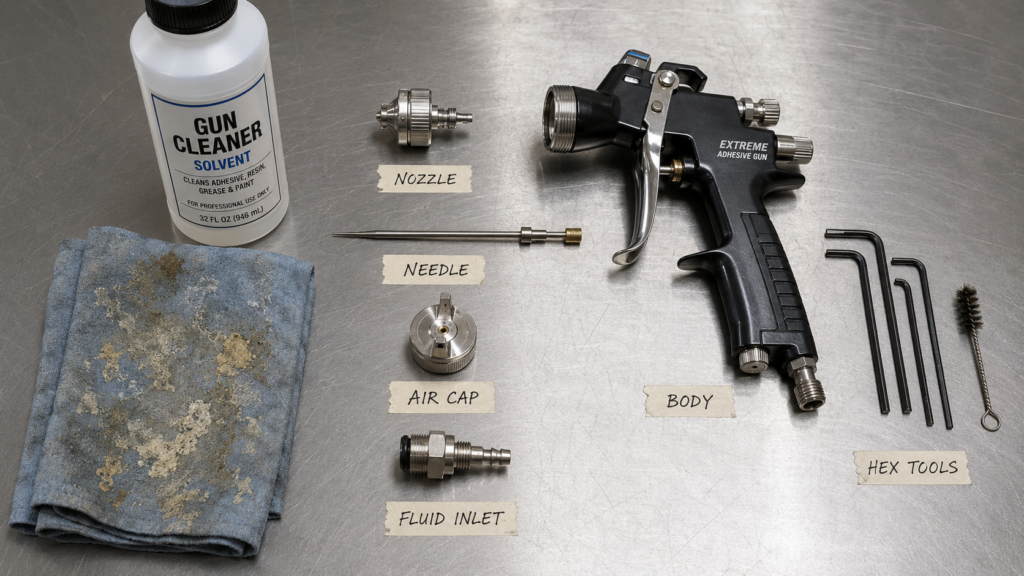
Typically, uneven spray patterns caused by clogging can be solved by cleaning your tip. To do this, remove your tip from the front of the gun, apply a mild solvent to the tip, let it soak, then rub it gently with a clean cloth.
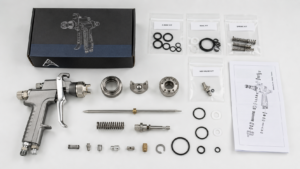
Remove the air cap and clean it using solvent and the brushes that come in your maintenance kit. Do not use picks to clean the holes out, as they can easily get damaged.
If cleaning doesn’t work, and you are still not getting a good spray pattern after cleaning out the air cap, it is damaged and should be replaced.
When using paints and adhesives that quickly harden in the presence of air, it can be effective to soak the tip of the air cap in a cleaning solution after spraying.
Also, if your adhesives harden quickly, consider increasing hose diameter when working with thicker adhesives that can get stuck in the liquid supply path.
A leaking spray gun wastes expensive adhesive and creates a hazardous work surface. There are several distinct leak types, and each has a specific fix.
Dripping or leaking from the nozzle tip when the gun is not triggered means the needle and nozzle are not seating correctly.
First, check whether the nozzle is simply loose.
A leaking spray gun is a common problem among professional and amateur sprayers alike. It’s often caused by the fluid nozzle becoming loose or dried adhesive blocking the needle. The solution is to remove your spray gun nozzle, clean it, and then readjust.
If packing is leaking, you need to adjust it. Simply tighten down the packing nut until the leak ceases. If this does not work, you need to replace the needle seal packing.
A leaking cup creates a mess and prevents proper atomization.
To address this, replace seals (they are inexpensive), tighten the paint cup threads gently but firmly, and inspect for cracks replacing the cup if needed.
For a quick leak test after reassembly, test for leaks using water. Turn the spray gun upside down and fill it with water. Check to see if it is leaking at the fluid nozzle. If leaking, replace both the nozzle and needle.
An uneven spray pattern means wasted adhesive and inconsistent bond quality especially problematic in industrial settings.
Asymmetrical or Teardrop Pattern
An asymmetrical spray pattern is likely due to a clogged, dirty, or damaged air cap. If you are not getting even airflow from all of the holes in the air cap, your spray pattern will suffer as a result.
Similarly, a spray pattern should be an even oval shape, so if you’re noticing a teardrop effect, it’s likely that one or more holes on the spray cap are clogged.
When you see a spray pattern where the glue is very heavy on the top and bottom and appears normal in the middle, this is called “tailing.” The problem is usually that there is too much adhesive flowing through the gun. This can be fixed by dialing down the flow, finding the adjustment nut just behind the trigger and moving it forward, or tightening it.
If the spray pattern is irregular, bubbly, or sputtery, check that the valves on both the canister and gun are open. If they are open, it’s likely that the hose needs to be purged. Hold your gun over a waste container and pull the trigger until the spray pattern appears normal, usually 30–45 seconds.
Getting air pressure wrong is one of the most common and most overlooked causes of spray gun problems.
The pressure setting on a spray gun controls how much air mixes with the adhesive, which affects atomization, spray pattern, and overall finish. Too much pressure can lead to excessive overspray and wasted material, while too little pressure may result in a poor, inconsistent spray pattern.
If you find that you’re getting uneven coverage or even a splatter effect from your spray gun, it’s likely that the air pressure isn’t correct for the viscosity of the liquid you’re using for example, air pressure that is too low for thicker adhesives. The solution is to readjust the air pressure or the product viscosity until the gun sprays evenly.
An HVLP spray gun typically operates at a lower pressure (10–20 PSI at the nozzle), while a conventional spray gun may require higher pressure, around 40–60 PSI.
For adhesive-specific applications,
control atomization air pressure in relation to adhesive volume, and match the spray gun and settings nozzle, needle, and air cap with the adhesive being used.
Inconsistent pressure results in fluctuating spray patterns, uneven coverage, and frustration.
To stabilize pressure, inspect and tape leaking connections, drain moisture traps regularly, replace air filters on the compressor or spray gun, and tighten fittings and couplers.
The best adhesive spray gun troubleshooting is the kind you never have to do. Here are habits that keep your equipment running reliably.
Make sure you are following manufacturer recommendations for pressure and temperature settings, and that the settings match the adhesive you use.
Furthermore, check O-rings and seals regularly and replace worn seals early to avoid leaks and pressure problems. Store your spray gun in a dry environment and protect it from dust. Always choose the right nozzle size and viscosity for your coating.
For industrial guns especially, always service the spray gun immediately after use. The swapping and maintenance of a spray gun should take about 5 minutes. If maintenance is not immediate and adhesive is allowed to dry, expect servicing time of about 1 hour, not including possible interruption to production.
Recurring clogs usually point to an air pressure mismatch or an incompatible adhesive viscosity.
Since adhesives are more viscous and shear differently than most other liquids, you need to spray adhesives with a conventional spray gun or one specifically designed for adhesives. If you try another technology like HVLP or LVLP, you may not be able to adequately break the adhesive apart or achieve the desired pattern.
Check that your gun type matches your adhesive type.
This is a packing issue.
If packing is leaking, you need to adjust it. Simply tighten down the packing nut until the leak ceases. If this does not work, you need to replace the needle seal packing.
It’s an inexpensive fix and should be your first step before assuming major internal damage.
If your adhesive is the correct consistency but your spray gun is still producing inconsistent patterns, take a look at your air compressor. HVLP guns require high volumes of air measured in CFM. If your air compressor is producing a low volume of air, this might be contributing to an uneven spray pattern.
Check that your compressor’s CFM output matches the gun’s requirements.
A well-maintained adhesive spray gun is a reliable, high-performance tool. Most issues from spray gun nozzle clogging to industrial spray gun leaking have straightforward solutions when you know where to look. This adhesive spray gun troubleshooting guide gives you the framework to diagnose and fix every common problem quickly and confidently.
Ready to take your spray gun performance to the next level? Bookmark this guide, build a regular maintenance routine, and always keep a cleaning kit and spare seals on hand. If your gun continues to underperform after following these steps, consult your manufacturer or an equipment specialist for a full service or rebuild.